July 9, 2026
See how to use a POS system in a restaurant with clear steps for setup, tables, menus, orders, payments, reports, and team training before service starts.
Opening a restaurant brings a lot to manage at once. You need to take orders, send tickets to the kitchen, accept payments, track staff activity, and review sales at the end of the day.
A restaurant POS system can keep these tasks organized, but the setup and daily workflow may feel new at first. This guide shows how to use a POS system in a restaurant step by step. You will learn how to set up the system, add tables and menu items, create staff logins, manage orders, process payments, review reports, and train your team before service begins.
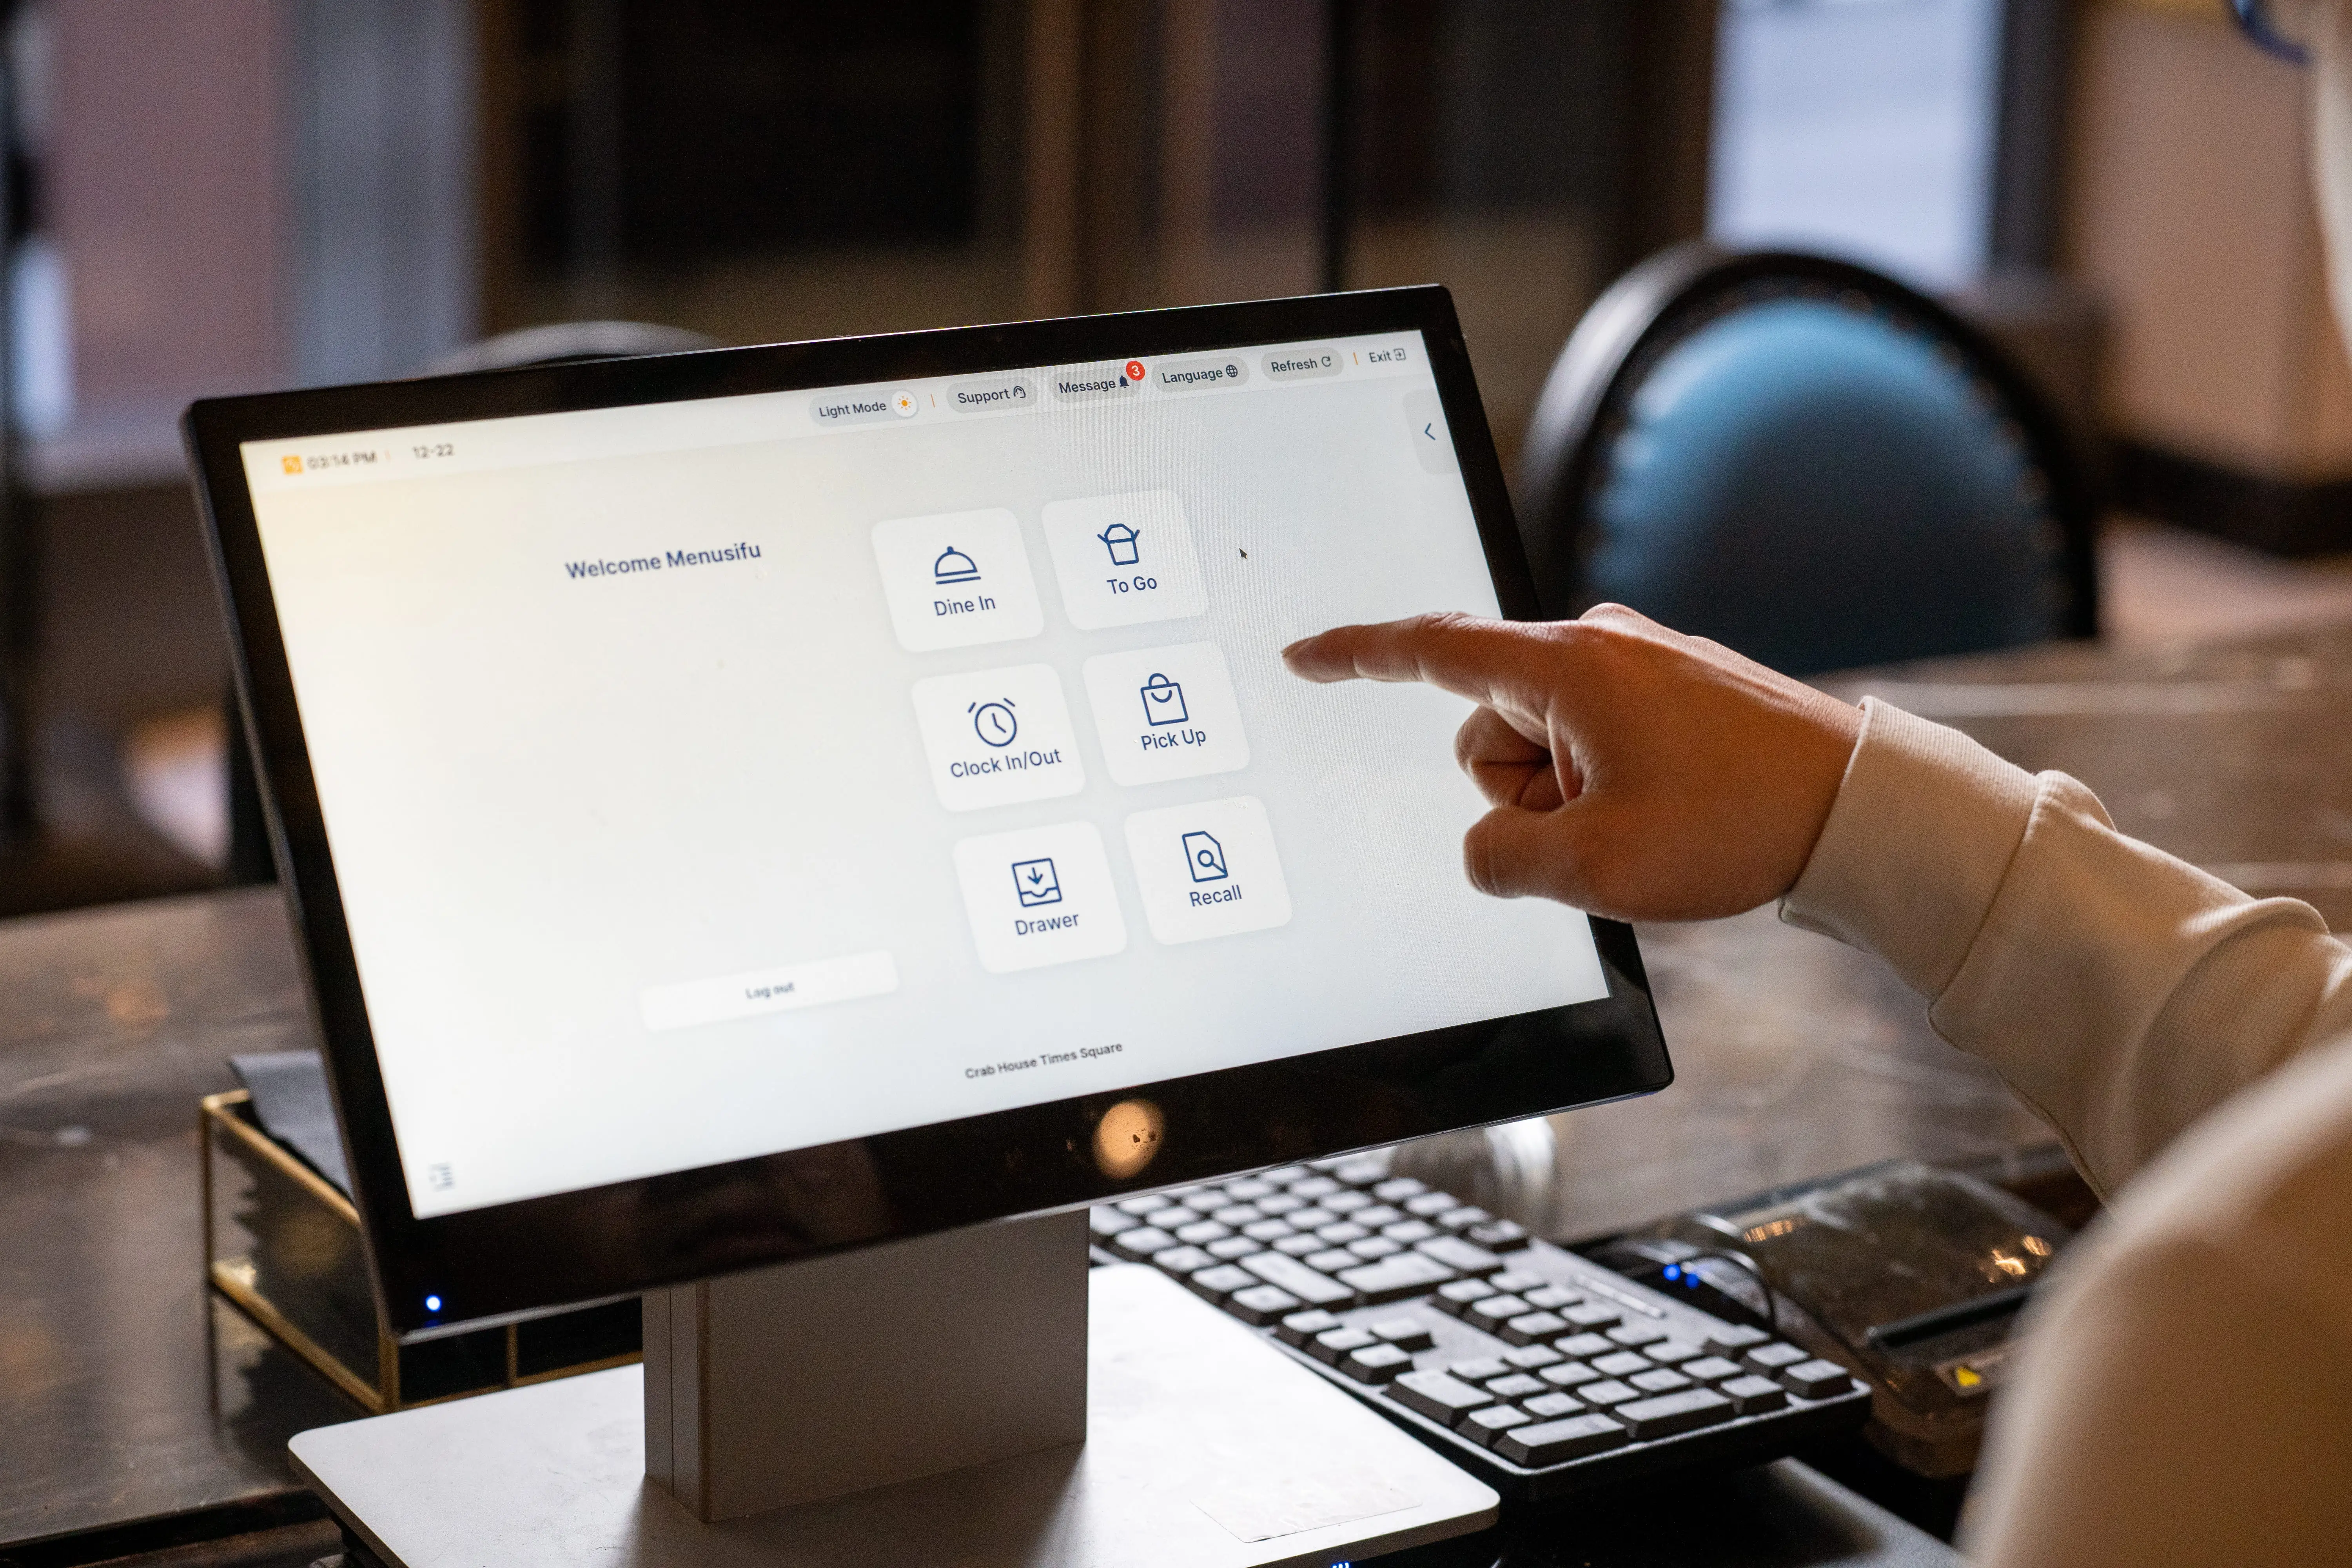
Your POS system should reflect how your restaurant takes orders, serves guests, collects payments, and reviews sales. Before you use it during live service, set up the basics, test each workflow, and train your team on daily tasks. Use the steps below to build a clear POS process from setup to end-of-day review.
Before service begins, configure your POS basics. This gives your system the right business details, hardware connections, payment settings, and service rules.
Start by adding your restaurant name, location, and business details. These details may appear on receipts, reports, customer records, and account settings.
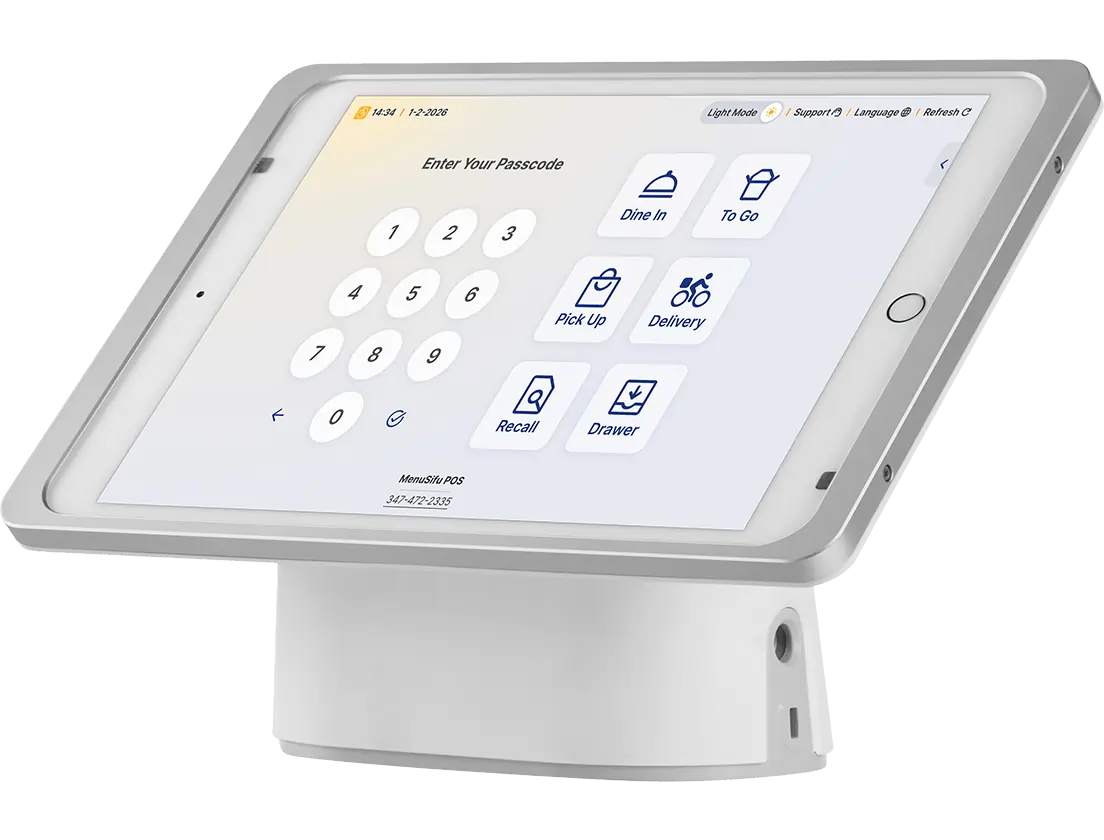
Next, connect the devices your team will use during service. These may include:
Then set up payment processing so your restaurant can accept common payment methods. Add tax settings, service charges, tip options, and basic business rules based on how your restaurant operates.
A complete setup helps prevent order errors, payment issues, and staff confusion once your restaurant opens. It also gives your team a clear starting point before the first customer order.
After setting up the basics, build your POS layout around your service model. Your system should align with how guests order, dine, pay, and receive their food.
If you offer dine-in service, add tables and organize them by section. You can create areas such as indoor dining, outdoor seating, private dining rooms, bar seating, or patio areas. This helps servers assign orders to the right table and manage open checks during service.
You should also add the order types your restaurant offers, such as:
A clear setup helps staff choose the right order type quickly. It also helps the kitchen and cashier teams handle each order based on how the customer placed it.
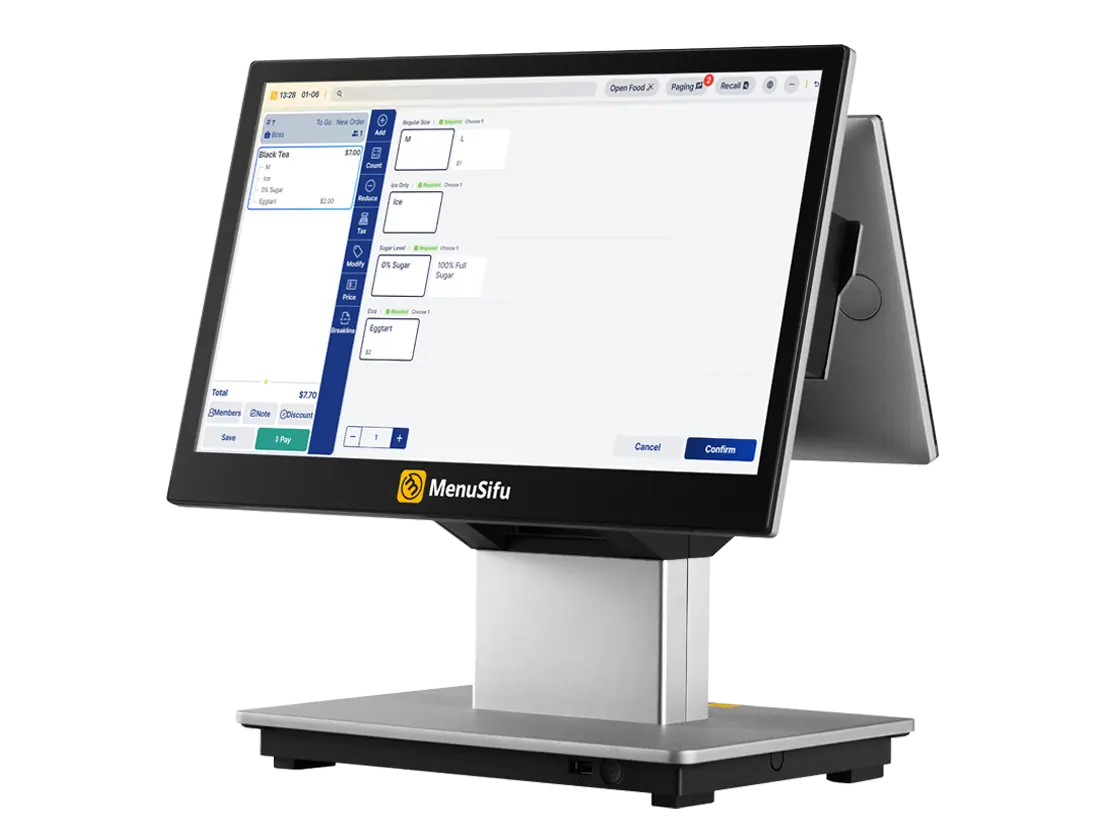
Your menu setup affects order speed, kitchen accuracy, and sales reporting. Add each menu item carefully so staff can find and enter orders with ease.
Start with food and drink names. Use clear item names that your team can recognize during service. Then add prices and group items into categories such as appetizers, mains, desserts, beverages, combos, and add-ons.
Next, add modifiers that capture customer preferences. These may include:
Apply taxes, service charges, and discounts when needed. If some items follow different tax or pricing rules, set them correctly before launch.
A clean menu setup speeds up order taking and improves reporting. It also helps the kitchen receive accurate item details.
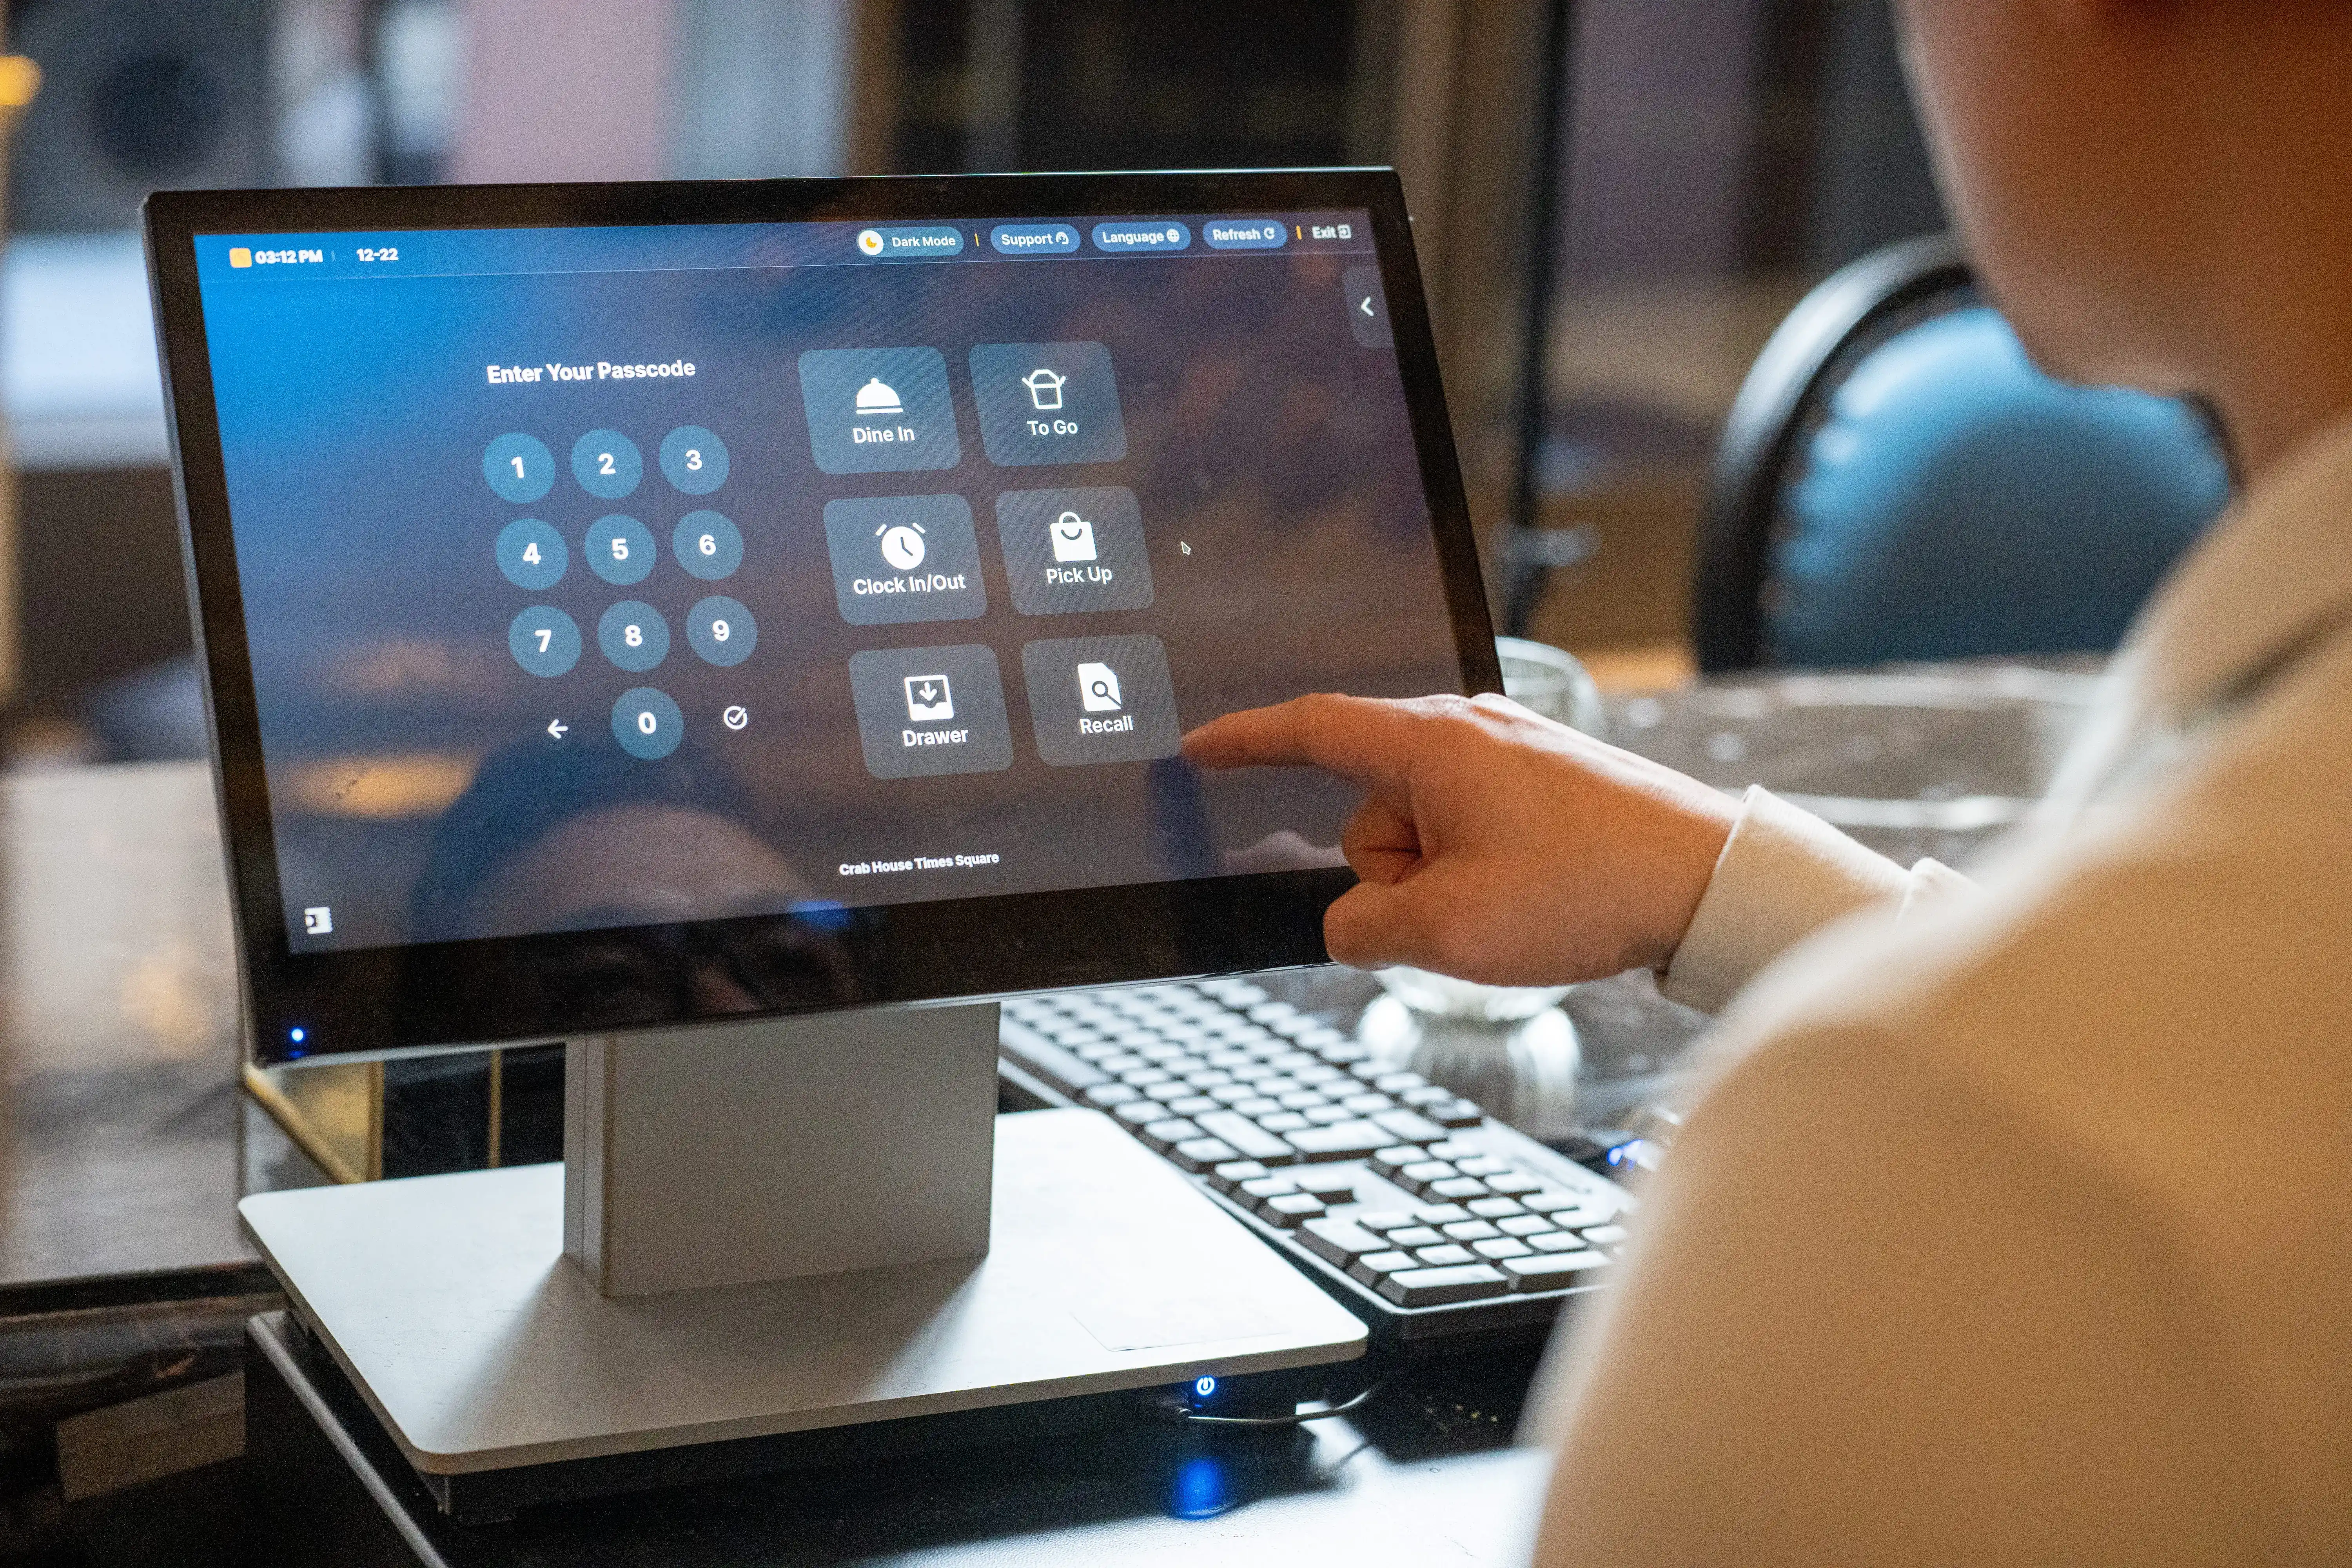
Each staff member should have a unique POS login. Individual accounts help you track activity and control access to sensitive tools.
Create accounts based on team roles, such as:
Then set permissions based on each role. For example, cashiers may take payments, while managers may approve refunds, apply discounts, void orders, and access reports. Admin users may manage menus, settings, integrations, and business data.
These permissions help protect your revenue and business information. They also let you see who completed each action, such as opening a check, applying a discount, processing a refund, or closing a sale.
During service, staff use the POS system to enter customer orders. The process usually starts with choosing the order type, selecting menu items, adding modifiers, and confirming the details.
For dine-in orders, servers can assign the order to a table and keep the check open until guests finish their meal. For takeaway orders, staff can enter the order, add customer details if needed, and prepare it for pickup. For delivery orders, staff can add delivery details and mark the order correctly in the system.
If your POS connects with online ordering, online orders may appear directly in the system. This helps your team manage dine-in, takeaway, delivery, and online orders from one place.
Before sending the order, staff should check item names, quantities, modifiers, table numbers, and notes. A quick review helps reduce mistakes before the kitchen starts preparing the food.
Once staff confirm an order, the POS system can send it directly to a kitchen printer or kitchen display system. This keeps the front-of-house and back-of-house teams aligned.
Kitchen staff receive key order details, such as:
Staff should enter modifiers and special instructions clearly. For example, they should select the right modifier for spice level, toppings, cooking preference, or side dish. If they need to add a note, they should keep it clear and specific.
Clear order details reduce miscommunication between servers, cashiers, and kitchen staff. They also help the kitchen prepare orders in the right sequence during busy hours.
A POS system helps your restaurant accept payments and record each transaction. Once the customer is ready to pay, staff can open the check, review the order, apply approved adjustments, and choose the payment method.
Common payment methods include:
For split payments, staff may divide the bill by item, seat, percentage, or custom amount, depending on the system. For tips, the POS can prompt customers to select or enter a tip before completing payment.
After payment, the POS records the sale, updates sales data, and generates a printed or digital receipt. These records help you review revenue, taxes, payment types, and end-of-day totals.
Discounts, refunds, voids, and canceled orders affect sales reports, so your team should handle them carefully.
Use discounts for approved promotions, loyalty offers, staff meals, or customer service situations. Void incorrect items before payment when staff catch an error early. Process refunds after payment when a customer needs a payment correction.
Your POS should also let staff record reasons for adjustments, such as:
Set manager approval for sensitive actions such as large discounts, refunds, and voids. Permission settings help protect revenue and reduce unauthorized adjustments.
After service, use POS reports to review how your restaurant performed. These reports help you make better decisions about staffing, menu pricing, purchasing, and daily operations.
Start with reports such as:
Daily sales reports show how much revenue your restaurant generated. Payment summaries show how customers paid. Item reports show which dishes sold well and which ones may need review.
End-of-day summaries help you close the day with cleaner records. They also help you spot sales errors, unusual adjustments, and payment issues before they affect future reports.
Some restaurant POS systems include inventory tools or connect with inventory management software. These tools help you track how sales affect stock levels and menu performance.
A POS system can help you monitor:
Inventory tracking helps you control costs and avoid running out of key ingredients. It also helps you plan purchases based on actual sales data.
Menu performance reports can also show which items drive sales and which ones need changes. If an item sells often but produces low profit, you may need to review its price, portion size, or ingredient cost.
Your staff should learn the basic POS workflow before serving customers. Training helps reduce errors and helps each team member use the system correctly.
Train your team on common tasks such as:
Practice transactions help staff learn before real orders begin. You can create sample orders, test split payments, run refunds, void items, and send test tickets to the kitchen.
A simple POS training checklist also helps. Use it to confirm that each cashier, server, manager, and kitchen user knows the daily tasks tied to their role.
A POS system needs regular updates as your restaurant changes. Menu items, prices, staff roles, promotions, taxes, and payment settings can all change over time.
Review your POS settings on a regular schedule. Check areas such as:
You should also test hardware and connected tools from time to time. Check printers, cash drawers, terminals, kitchen displays, online ordering connections, and payment devices.
Regular reviews keep your POS system accurate and useful as your restaurant grows. They also help your team avoid outdated menu details, incorrect pricing, and reporting errors.
A restaurant POS system works best when it matches how your team takes orders, sends tickets, accepts payments, tracks inventory, and reviews daily sales. With the right setup, your staff can follow a clearer process from the first order to the end-of-day report.
As your restaurant grows, your POS system can help you keep menus updated, manage staff access, review performance, and make better daily decisions. Start with the basics, train your team, and review your settings often so your system stays aligned with your operations.
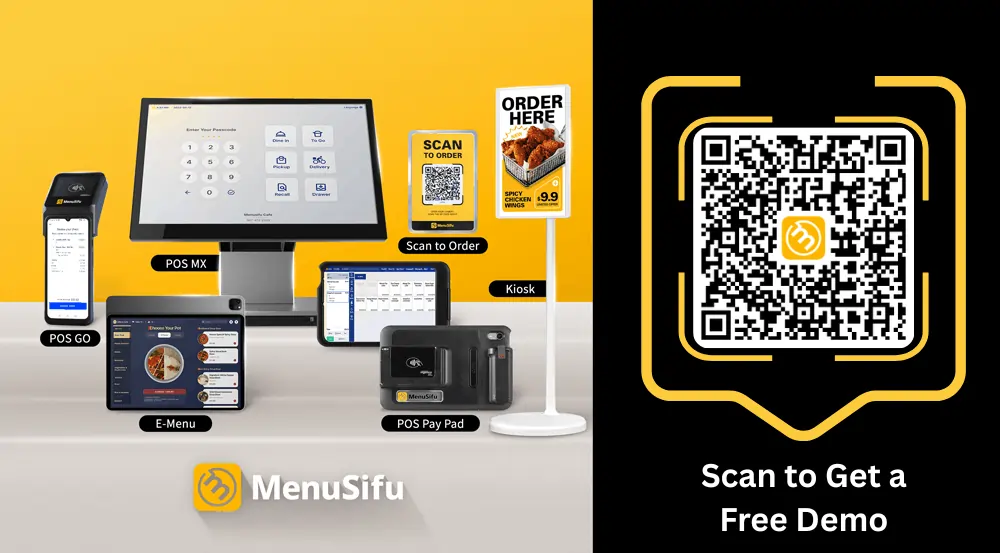
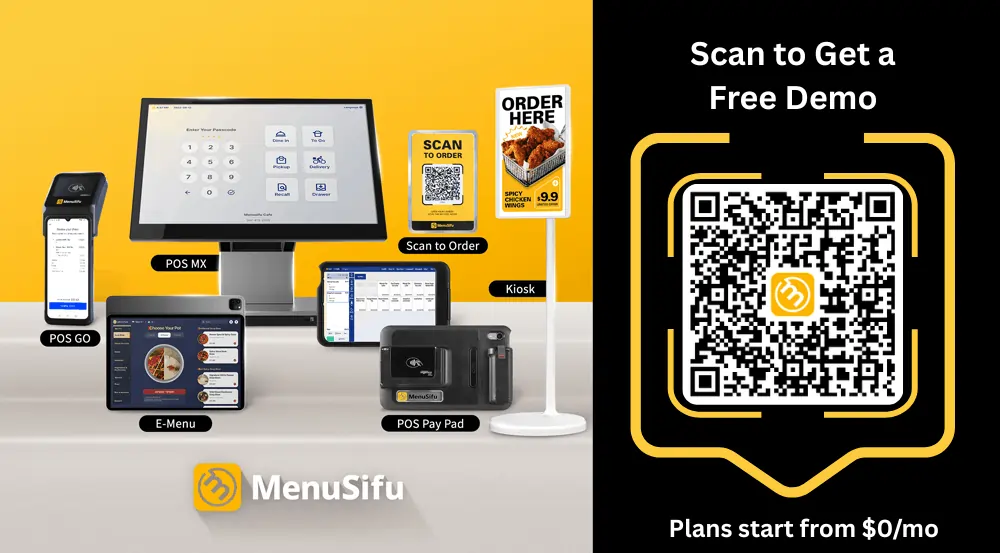
MenuSifu helps restaurants manage orders, payments, menus, kitchen communication, reporting, and more in one connected POS solution. We also provide industry-leading 3-day onboarding for most restaurants, with a dedicated team that handles menu setup, system configuration, installation, and staff training.
Book a Free Demo with MenuSifu today to see how we can help you set up a POS system that supports your daily restaurant workflow.
These FAQs answer common POS setup, payment, training, and order management concerns. Use them as a quick reference as you prepare your system and train your team.
Set up the basics first, including your restaurant name, location, business details, payment processing, tax rules, service charges, and POS hardware such as terminals, receipt printers, cash drawers, and kitchen printers. After that, add your tables, order types, menu items, staff accounts, and user permissions so your team can take orders, send tickets to the kitchen, and process payments correctly.
Yes. A restaurant POS system can manage dine-in, takeout, and delivery orders in one place. You can assign orders to tables, mark takeout orders for pickup, send delivery details to staff, and route tickets to the kitchen. This helps your team organize orders by service type and keep sales records accurate.
Each staff member should have their own POS login so you can track who enters orders, processes payments, applies discounts, voids items, or issues refunds. Individual logins also let you set role-based permissions, which helps protect sales data, limit access to sensitive features, and keep daily operations more accountable.
A restaurant POS system can accept payments such as cash, credit cards, debit cards, mobile wallets, gift cards, split payments, partial payments, and tips. Some systems also support online payments, QR code payments, and house accounts, depending on the provider and payment processor.
Train staff with role-based practice before live service. Show cashiers how to enter orders, process payments, apply approved discounts, and issue receipts. Train servers on table orders, modifiers, split checks, and closing bills. Give managers extra training on refunds, voids, reports, and permission approvals.
Run practice transactions, use a simple POS training checklist, and let staff repeat common tasks until they can complete them accurately.
For more restaurant technology tips, POS insights, and operational guides, visit our blog section for the latest updates.
Related Articles: